Black Ops 6’s Zombies mode has a French citadel for avid gamers to discover in Citadelle des Morts, and people who are excited by conquering the toughest demanding situations of all can have interaction within the Citadelle des Morts Easter Egg, which includes a Primary Quest for the core Zombies Workforce of Weaver, Maya, Gray, and Carver. There are somewhat a couple of steps to this Easter Egg, and they all had been laid out for avid gamers under.
 Comparable Black Ops 6: The way to Improve All 4 Elemental Swords in Citadelle des Morts Black Ops 6 Zombies options immense energy throughout the hilts of 4 Elemental Swords in Citadelle des Morts, and this is how one can get all of them.
Finishing the Primary Quest in Black Ops 6 Zombies’ Citadelle des Morts isn’t going to be simple, particularly for solo avid gamers, however the map is a brilliant addition and any COD Zombies fan wishes to aim it for themselves to combat the boss inside of and discover Richtofen’s subsequent steps.
Step 1: Turn on Pack-a-Punch and Talk with Gabriel Krafft
The very first thing that avid gamers will have to do to cause the principle quest in Citadelle des Morts is to turn on the Pack-a-Punch Device discovered throughout the Oubliette Room. Avid gamers want to turn on the cannon within the Courtyard’s Ramparts space to breach the Front Corridor to the citadel, which is able to let them navigate into the bowels and unencumber Pack-a-Punch. After this has been accomplished, head to the Dungeon the place Fast Revive is situated, and avid gamers can have interaction with the North West picket mobile to cause a dialog with Gabriel Krafft. Zombies won’t assault avid gamers whilst Krafft is talking.
Step 2: Download All Torn Web page Fragments
Your next step is to procure 4 Torn Web page Fragments which might be scattered across the Sitting Rooms space the place the Stamin-Up Perk can also be discovered. There are somewhat a couple of random spawn places for the Torn Web page Fragments, however all 4 of them are discovered throughout the Sitting Rooms space. Most likely spots contain the North partitions, reverse the North partitions, the sofa, the TV, the hearth, and the crates. They aren’t too arduous to seek out, as there are handiest 4 of them and they’re going to all the time be within the Sitting Rooms. It is a step that may be finished in any order, nevertheless it’s easiest to get it accomplished within the early rounds, after which it’ll develop into vital once more at Step 10.
Step 3: Download the Sword
Avid gamers will have to wait till Spherical 10 has been activated to permit for distinctive zombies to spawn at the map. Those distinctive zombies will probably be dressed in templar helmets that lead them to resistant to headshot harm, so merely shoot them within the frame to kill them. Each zombie with a templar helmet will dangle a novel merchandise: the Stamp. Avid gamers can head to the Eating Corridor the place Vulture Assist is situated to seek out 4 Knight statues. Interacting with any of them will liberate their sword for avid gamers to take. The objective now’s to improve each and every of those 4 swords, in any order, however for comfort, this information will take this order:
Dragon Sword (entrance proper statue) Lion Sword (again proper statue) Stag Sword (entrance left statue) Raven Sword (again left statue)
Steps 3 to eight can also be finished in any order, and avid gamers too can get the Incantation chests with out the corresponding Elemental Sword, however will not be able to open it till they’ve the sword itself.
Step 4: Gain the Caliburn Sword and the Fireplace Incantation
The Caliburn Sword can also be received after selecting up the Dragon Knight’s sword and finishing the improve steps within the Front Corridor that calls for avid gamers to price it with burning pyres that may be discovered right here: The way to Get the Fireplace Sword.
As soon as avid gamers have Caliburn, they may be able to both use the Sword’s Particular Assault or Molotov Cocktails to burn 3 explicit picket bonfires. Each and every of the picket bonfires can also be discovered within the Ramparts space, which is above the Courtyard accessed throughout the Elemental Pop or Melee Macchiato tunnels. Burning a bonfire will spawn zombies that can want to be killed. Listed here are the places for each and every bonfire:
Going through North of the Hillside Ramparts above the Elemental Pop room, glance as much as discover a bonfire subsequent to an antenna. Going through North, having a look immediately on the Front Corridor to the citadel, the place the bonfire can also be discovered at the higher platform. Going through South East of the village Ramparts, glance out to the Velocity Cola space to discover a bonfire simply above the Perk Device.
The 3rd bonfire spawns a Doppelghast, and killing it’ll disclose the Ra’s Ankh amulet that avid gamers can select up. Avid gamers want to deposit Ra’s Ankh on the sparkling image discovered within the North nook of the Courtyard’s Village Ramparts space. Now, kill zombies to price Ra’s Ankh, which then spawns a chest that avid gamers with the Caliburn Sword can hit to obtain the Fireplace Incantation.
Step 5: Gain the Solais Sword and the Gentle Incantation
Avid gamers can download the Solais Sword after selecting up the Lion Knight Sword and finishing its improve necessities discovered throughout the Higher Village: The way to Get the Gentle Sword.
With the Lion Sword received, avid gamers will want to shoot crystals with their weapons to deflect a beam of sunshine into them. Those crystals will have to be shot on the proper perspective to development. The perspective to shoot is all the time indicated by means of the beam of sunshine, and avid gamers simply want to face within the path of the beam of sunshine and its perspective. Avid gamers will have to take the beam from the Eating Corridor to the Alchemical Lab. There are 6 crystals to shoot, and right here’s the order and site that avid gamers will need to stand for it to paintings:
Shoot the primary crystal when status between the 4 knight statues, and glance up on the North wall when going through Vulture Assist so it deflects into the second one crystal. Stand in opposition to Vulture Assist and shoot the second one crystal so it displays to the 3rd crystal. Shoot the 3rd crystal discovered above the Lion Knight statue whilst status between the Crow and Stag Knight statues in order that it beams into the Alchemical Lab’s fourth crystal. Head into the Alchemical Lab and shoot the fourth crystal when status close to the table with the globe to the left to turn on the 5th crystal. Shoot the 6th crystal to the left of the Arsenal, status within the doorway to the Eating Corridor. Doing so will shine a beam of sunshine onto a marble bust on a table within the East nook of the Alchemical Lab. Interacting with it supplies avid gamers with the Paladin’s Brooch.
A pulsing golden circle could have spawned within the Eating Corridor’s South wall, and now avid gamers want to position the Paladin’s Brooch throughout the circle. Hold across the circle and kill round 20 zombies in order that a sparkling chest spawns. With the upgraded Lion Sword, avid gamers can now hit the sparkling chest to unencumber it after which have interaction with it to assert the Gentle Incantation.
Step 6: Gain the Durendal Sword and the Electrical Incantation
The Durendal Sword will have to be received for this step, and it may be bought by means of upgrading the Stag Knight Sword and discovering the 3 Lightning Urns, with detailed steps discovered right here: The way to Get the Lightning Sword.
As soon as the Durendal Sword is alleged, head to the Hilltop space throughout the barn with Deadshot Daiquiri and shoot the horseshoe that hangs off of the North West wall. Avid gamers can then select up Otto’s Horseshoe. From right here, head to the Rampart Cannon the place they’re going to be capable of release themselves to the The city Sq. for 500 Essence. Doing so will electrify the Horseshoe, and now avid gamers want to glance as much as the sky and scout the world on the lookout for a novel typhoon cloud.
Beneath the typhoon cloud is the Pegasus’ Horseshoe merchandise that avid gamers can select up. Avid gamers will have to then take this merchandise to the North West space of the The city Sq., the place they may be able to position it down on a sparkling sigil. Doing so will spawn zombies, and now avid gamers simply need to kill them till the sigil disappears and a chest spawns. Hit the chest with the Durendal Sword to obtain Electrical Incantations.
Step 7: Gain the Balmung Sword and the Darkish Incantation
For the fourth and ultimate sword improve and incantation, avid gamers will want the Balmung Sword, which is first discovered at the Crow Knight statue. Avid gamers then want to head into the Alchemical Lab and seek for a selected section, whether or not it’s a Horn, Fish, Scorpion, Jaw, or Fowl Cranium. Now, glance to this information on The way to Get the Balmung Sword.
With the Balmung Sword received, head into both the Oubliette Room by means of Pack-a-Punch and get entry to the Cave Slide for 500 Essence. Right through the Cave Slide section, avid gamers will want their gun on the in a position, as they’re on the lookout for a raven on the finish of the slide that must be shot. After avid gamers arrive on the The city Sq., the raven that they shot will probably be flying round, merely shoot it once more to smash it after which head over to its location to pick out up the Raven’s Talon.
Now, head to the Undercroft space the place avid gamers can to find the fourth and ultimate sparkling image at the ground subsequent to the West wall, which avid gamers will then want to have interaction with to put the Raven’s Talon and price it with zombie kills. And then, hit it with the Balmung Sword to procure the Darkish Incantation.
Step 8: Find and Shoot Particular Symbols
With all 4 Incantations received, it’s time to pick out up Melee Macchiato from the Courtyard’s proper room (It’s a Perk that avid gamers must have already got for its synergy with the devoted melee weapon of the Swords). With Melee Macchiato, head into the Undercroft and melee strike the South wall with a fist in order that the wall crumbles and divulges 20 symbols. Don’t be intimidated, as avid gamers handiest want to keep in mind 6 of those symbols.
The objective of this step is to shoot the symbols in a selected order, and the order can also be discovered throughout the Tavern, famous by means of the Roman numerals on 6 distinct bottles. The position of the bottles remains the similar within the Tavern, however the image will probably be distinctive to everybody’s personal sport:
1 (I) At the left facet of the bar 2 (II) At the desk closest to the Arsenal 3 (III) Within the North West nook of the room on a desk 4 (IV) Upstairs within the Tavern on a shelf by means of the pool desk 5 (V) On a sales space desk within the South phase of the Tavern VI (6) Within the a long way nook of the Tavern simply in the back of the doorway door from the The city Sq.
After interacting with the bottles, avid gamers will have to memorize the symbols that they’ve in each and every one, along side the order by which they arrive in. It’s more uncomplicated to attract them down as they’re going to be distinctive for everybody’s sport, however as soon as avid gamers know the symbols, head again to the Undercroft and shoot the symbols within the order that they seem from 1st to sixth. After taking pictures a logo, the location of them adjustments, so simply attempt to to find the following one till all 6 had been shot. Doing so accurately will spawn a crimson orb at the wall left to the symbols, and now avid gamers can have interaction with it, after which have interaction with it once more to put the Torn Web page Fragments they discovered in Step 2.
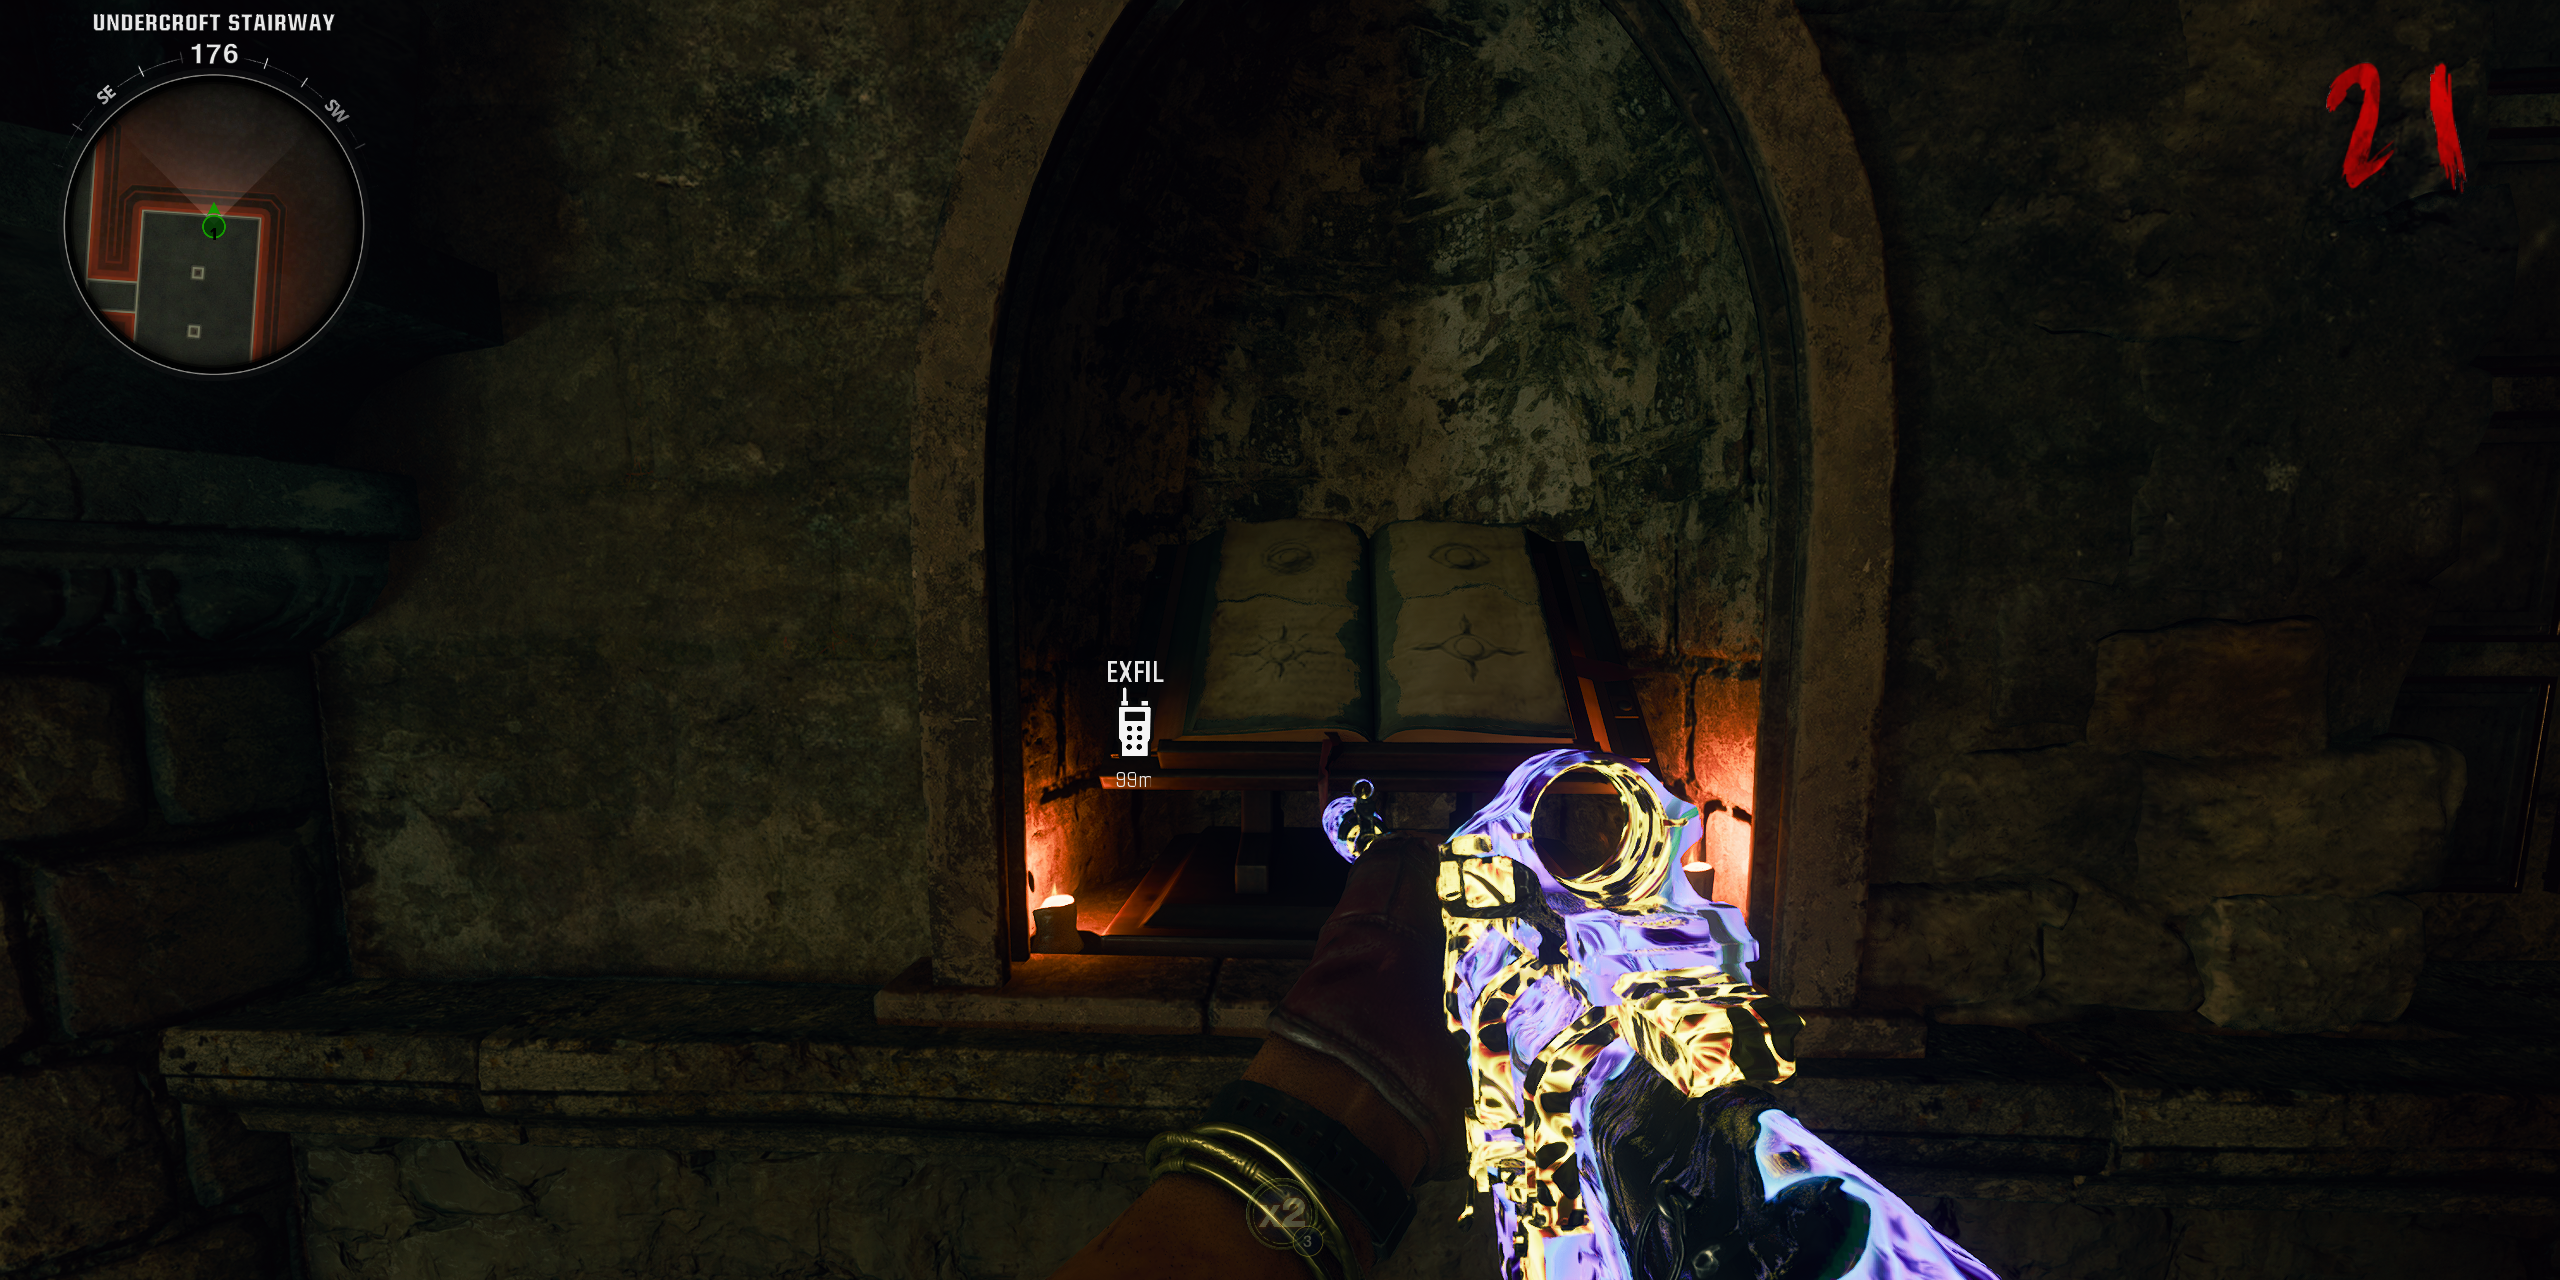
Step 9: Have interaction with the Ebook and Turn on Corresponding Traps
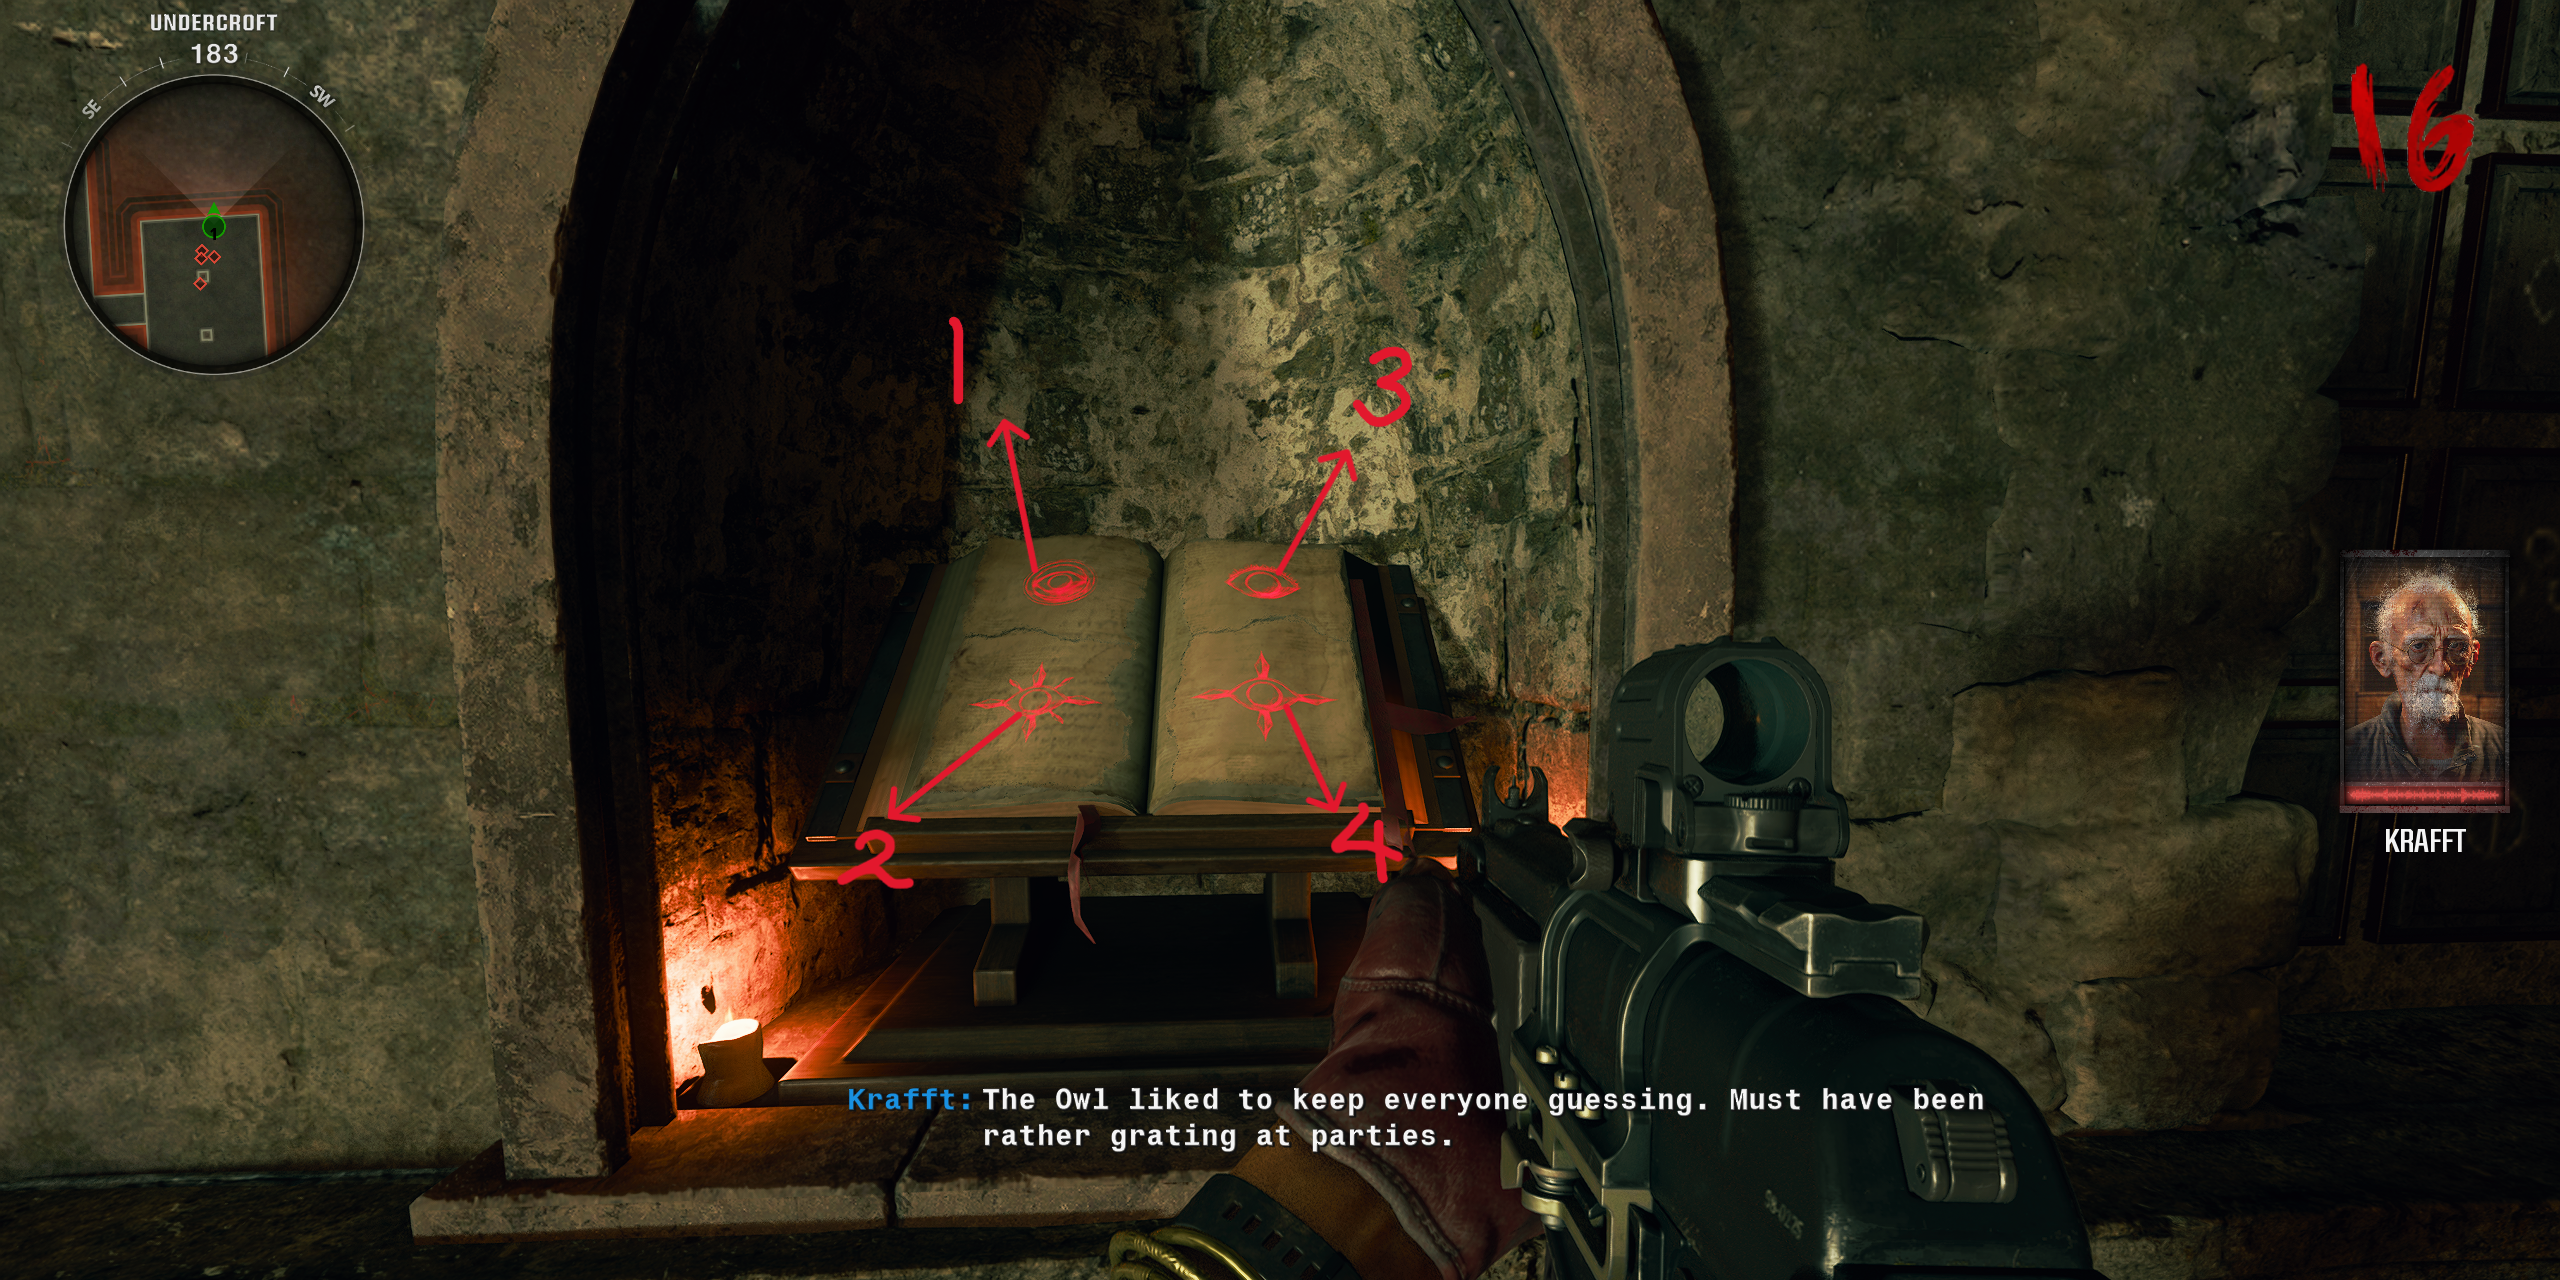
After interacting with the e book, the torn pages from Step 2 will seem as crimson symbols, and avid gamers want to memorize those symbols in a selected order:
Best Left is 1 Backside Left is two Best Proper is 3 Backside Proper is 4
There are 4 symbols to memorize, and the order of them will probably be distinctive to each sport:
Eyeball with a circle round it Eye with 8 issues Eye with eyelashes Eye with 4 issues
Avid gamers now want to test the Tac Map and discover, on the lookout for the Energy Traps that experience the emblem they’re on the lookout for. If their first image is the Eyeball with a circle, then search for that lure and turn on it for 1,500 Essence – doing so and killing round 10 zombies within the circle will deactivate the lure, and avid gamers can now go back to the Undercroft to look if the crimson image is now grey.
Avid gamers want to repeat this step for all 4 symbols, so it’s easiest to test after each Energy Entice use to look if it’s labored, as it may be a tad glitchy as some Energy Traps don’t rely in spite of being the emblem required. Happily, there’s multiple Energy Entice at the map.
Step 10: Check up on the Elemental Swords on the Knight Statues
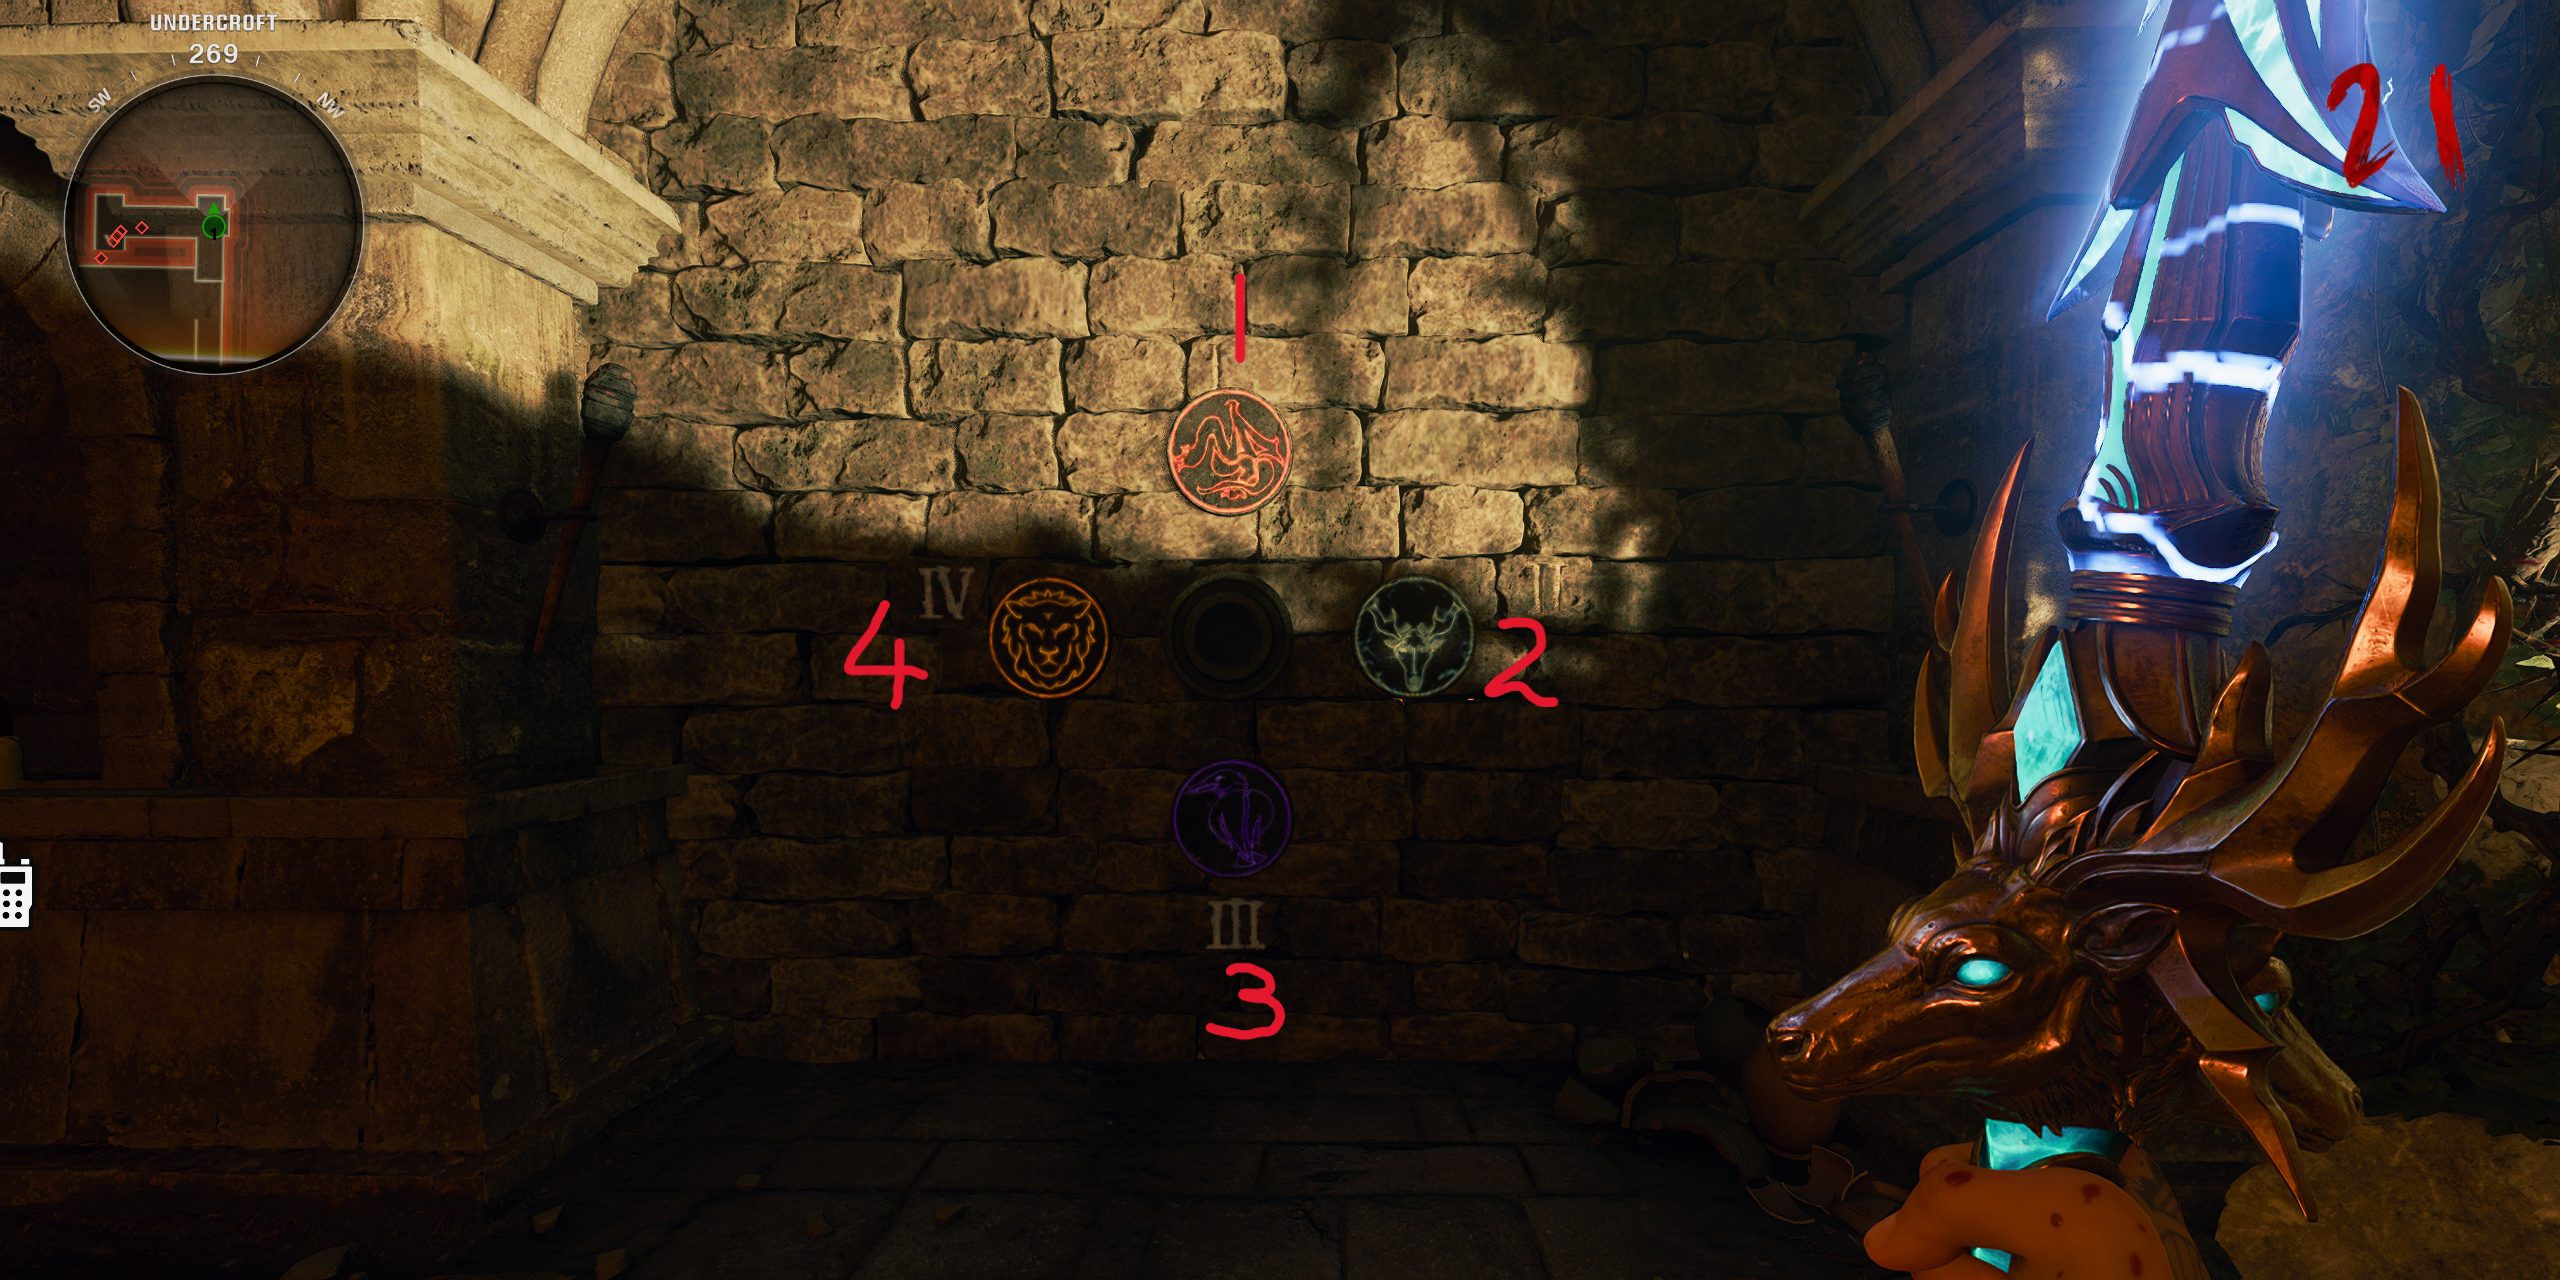
With all 4 symbols of the e book now entire, avid gamers can head into the Undercroft Stairway resulting in the Sitting Rooms with Stamin-Up. At the West wall will probably be 4 new symbols in a selected clockwise order, ranging from 12 o’clock (up place) and going clockwise. The symbols will probably be other in each and every sport, however avid gamers simply want to notice which order the symbols are available from:
First Image – Up 2nd Image – Proper 3rd Image – Down Fourth Image – Left
The symbols that seem will all the time be a crimson dragon, a blue stag, a pink raven, and a yellow lion.
Head to the Eating Corridor, the place there will probably be 4 Incantation containers across the space. Avid gamers will then want to take the sword that corresponds with the primary image and use their incantation at the knight that the sword belongs to. After the use of the Incantation, check out the sword with the Weapon Check up on emote wheel (Left at the D-Pad) which is able to make that statue glow. Avid gamers want to repeat this step for all of the statues, and simply in case avid gamers are puzzled:
Dragon Knight Statue – Caliburn Sword & Fireplace Incantation(Pink Dragon image) Stag Knight Statue – Durendal Sword & Electrical Incantation (Blue Stag image) Lion Knight Statue – Solais Sword & Gentle Incantation (Yellow Lion image) Raven Knight Statue – Balmung & Darkish Incantation (Red Raven image)
As soon as the statues had been activated in the proper order, a Mystical Orb will spawn within the middle of the statues, and it may be picked as much as start the next move.
Step 11: Whole the 4 Elemental Demanding situations with the Mystical Orb
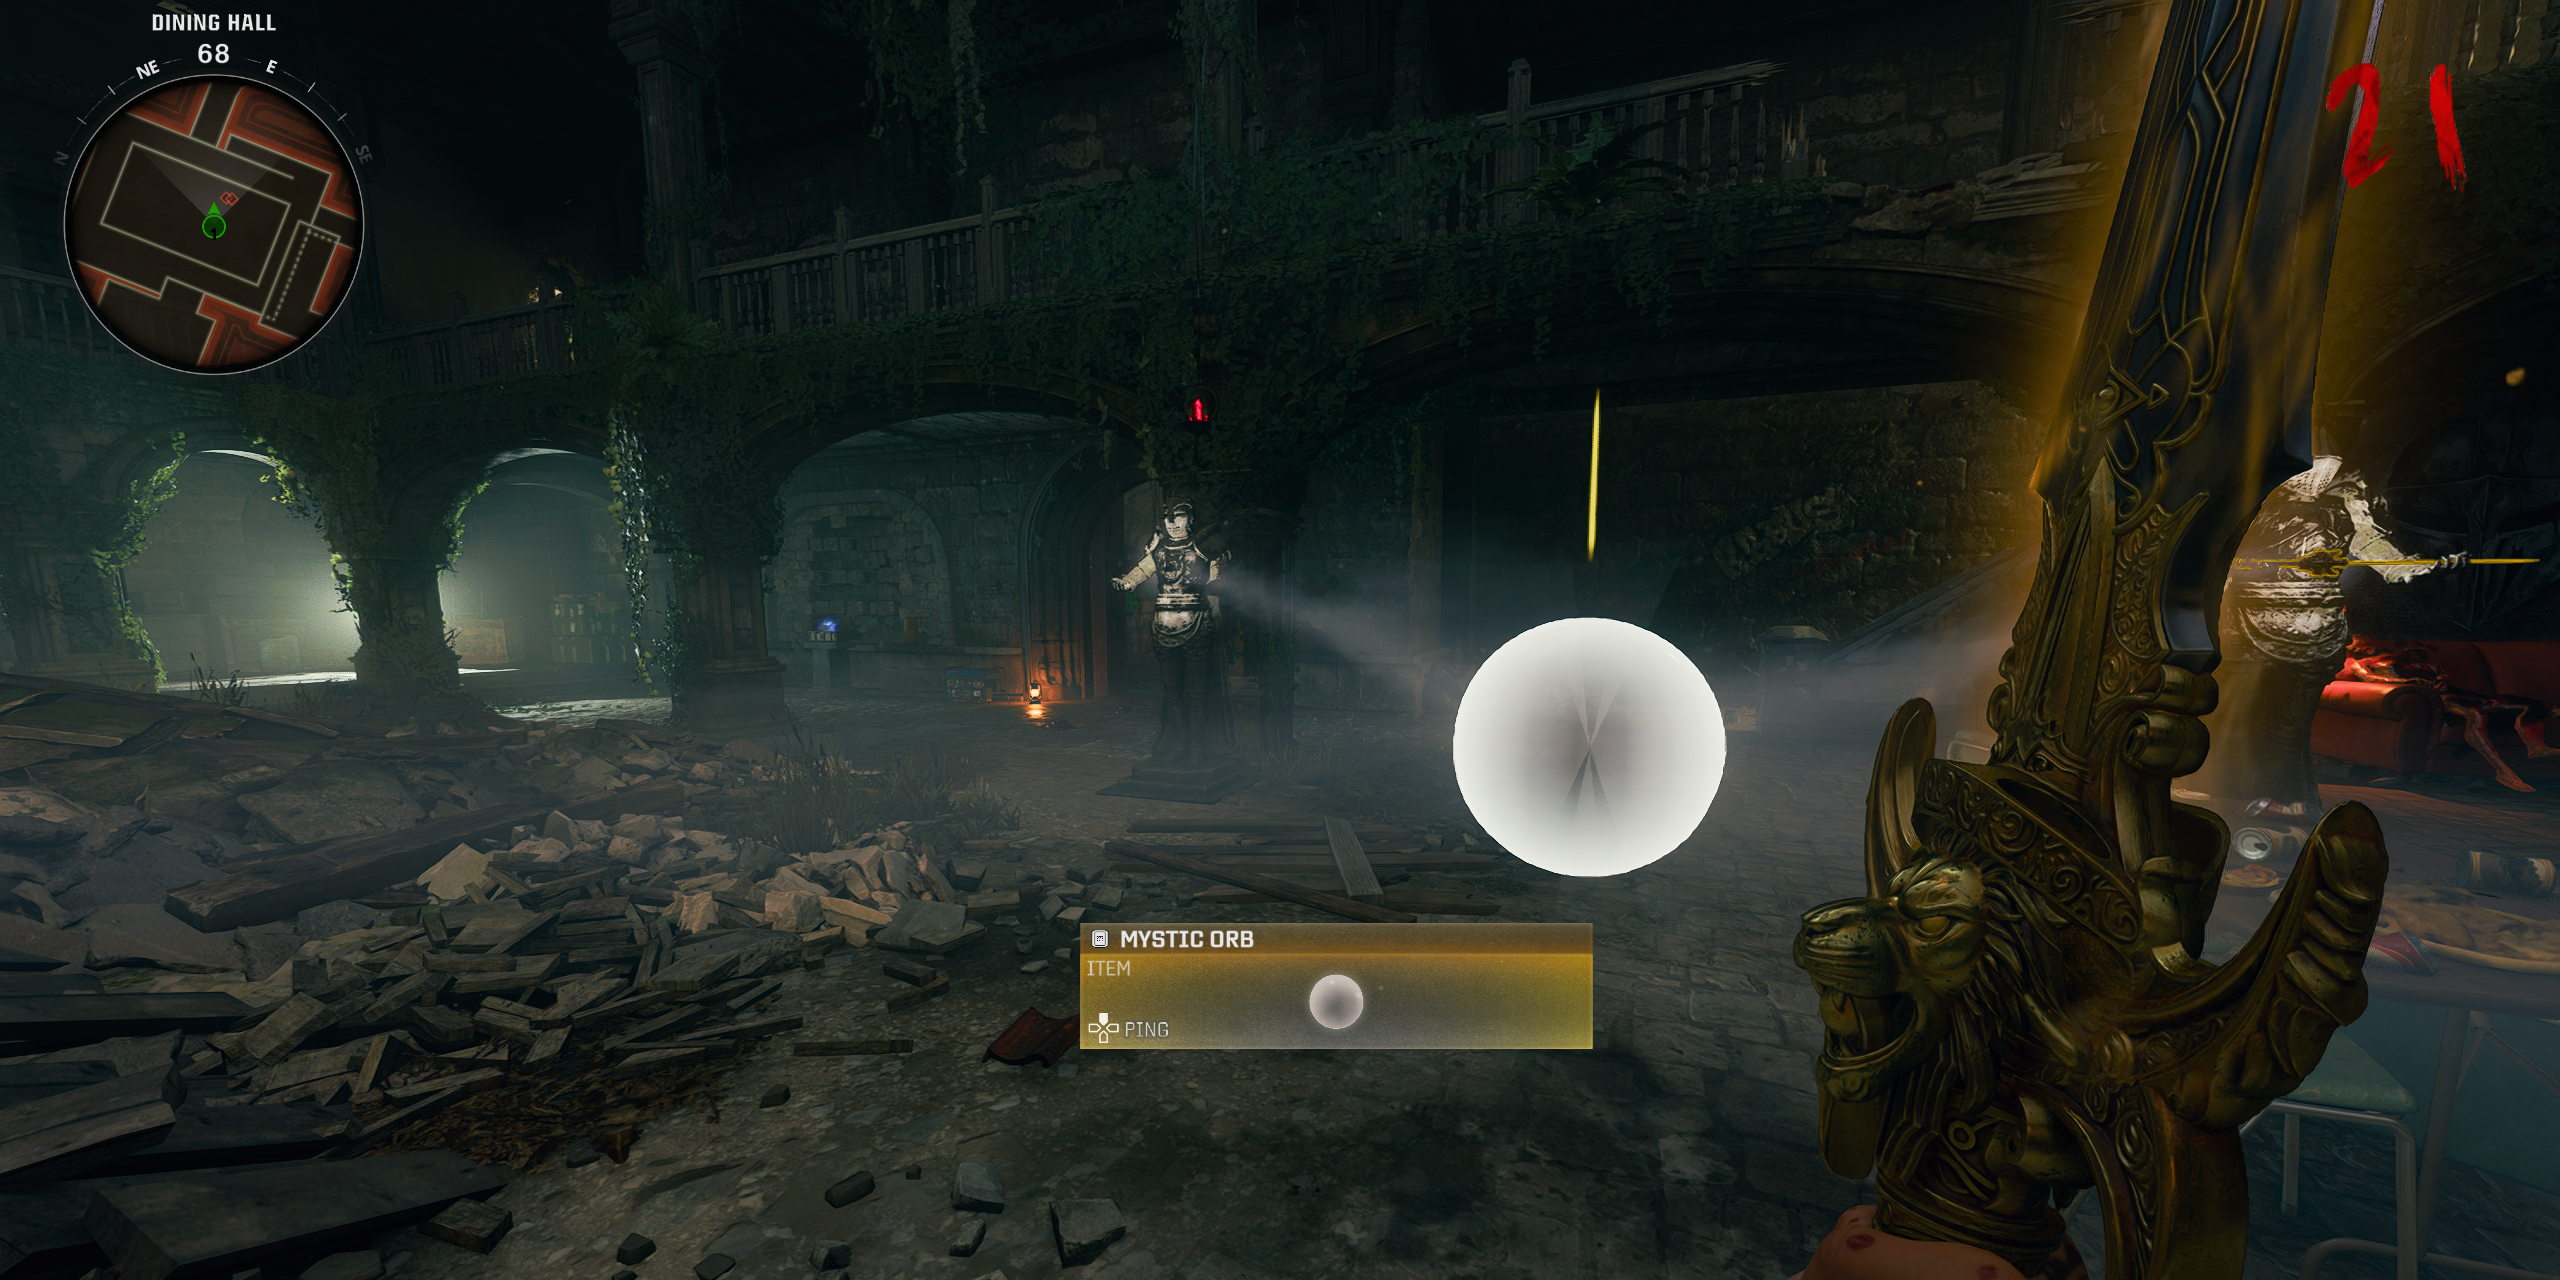
With the Mystical Orb received, avid gamers will have to now project throughout the map to put the Mystical Orb in explicit spots. There is not any order that will have to be adopted, however there will probably be explicit spots at the map the place avid gamers will have to take the Mystical Orb. As soon as the Mystical Orb has been positioned in its holder, avid gamers can view the colour of the orb that notes the sword they will have to use, after which they may be able to cross and take hold of that sword and have interaction with the orb to start the Elemental Problem. Happily for avid gamers, this information displays the place to take the Mystical Orb and what Elemental Sword avid gamers want to carry.
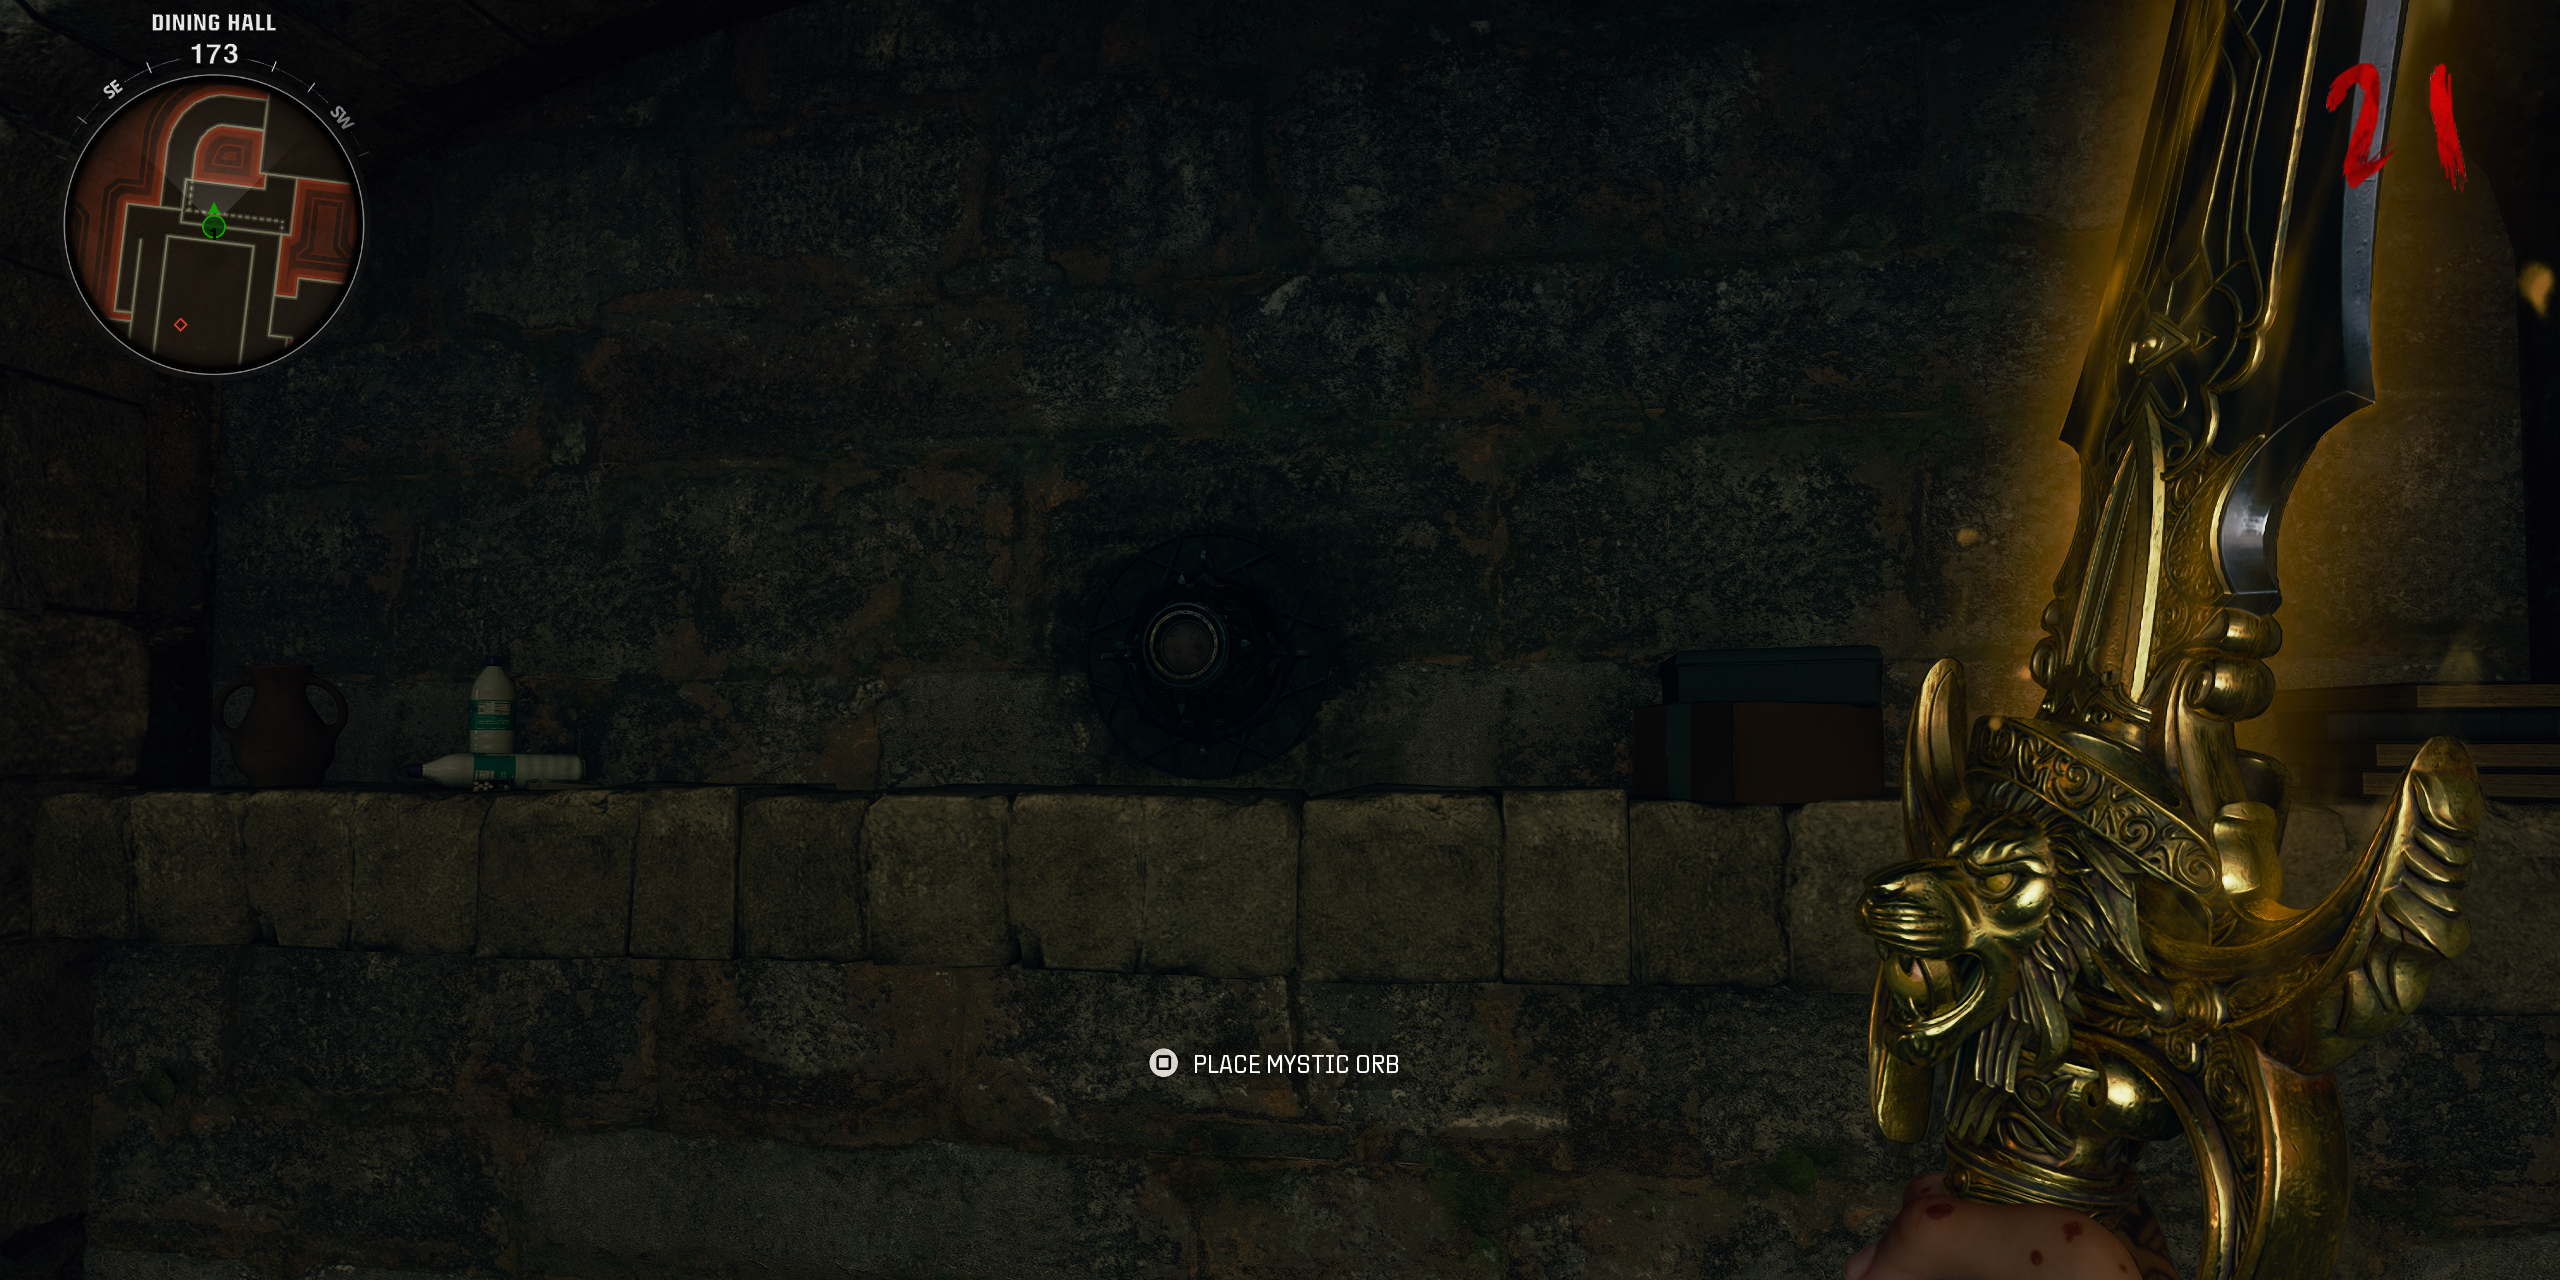
The primary Elemental Problem can also be discovered within the Eating Corridor’s higher ground on the South wall, reverse Vulture Assist. This problem calls for the Solais Sword, and all avid gamers want to do for this problem is administered across the Eating Corridor and acquire inexperienced orbs till the Mystical Orb is glad and avid gamers can select it again up once more.
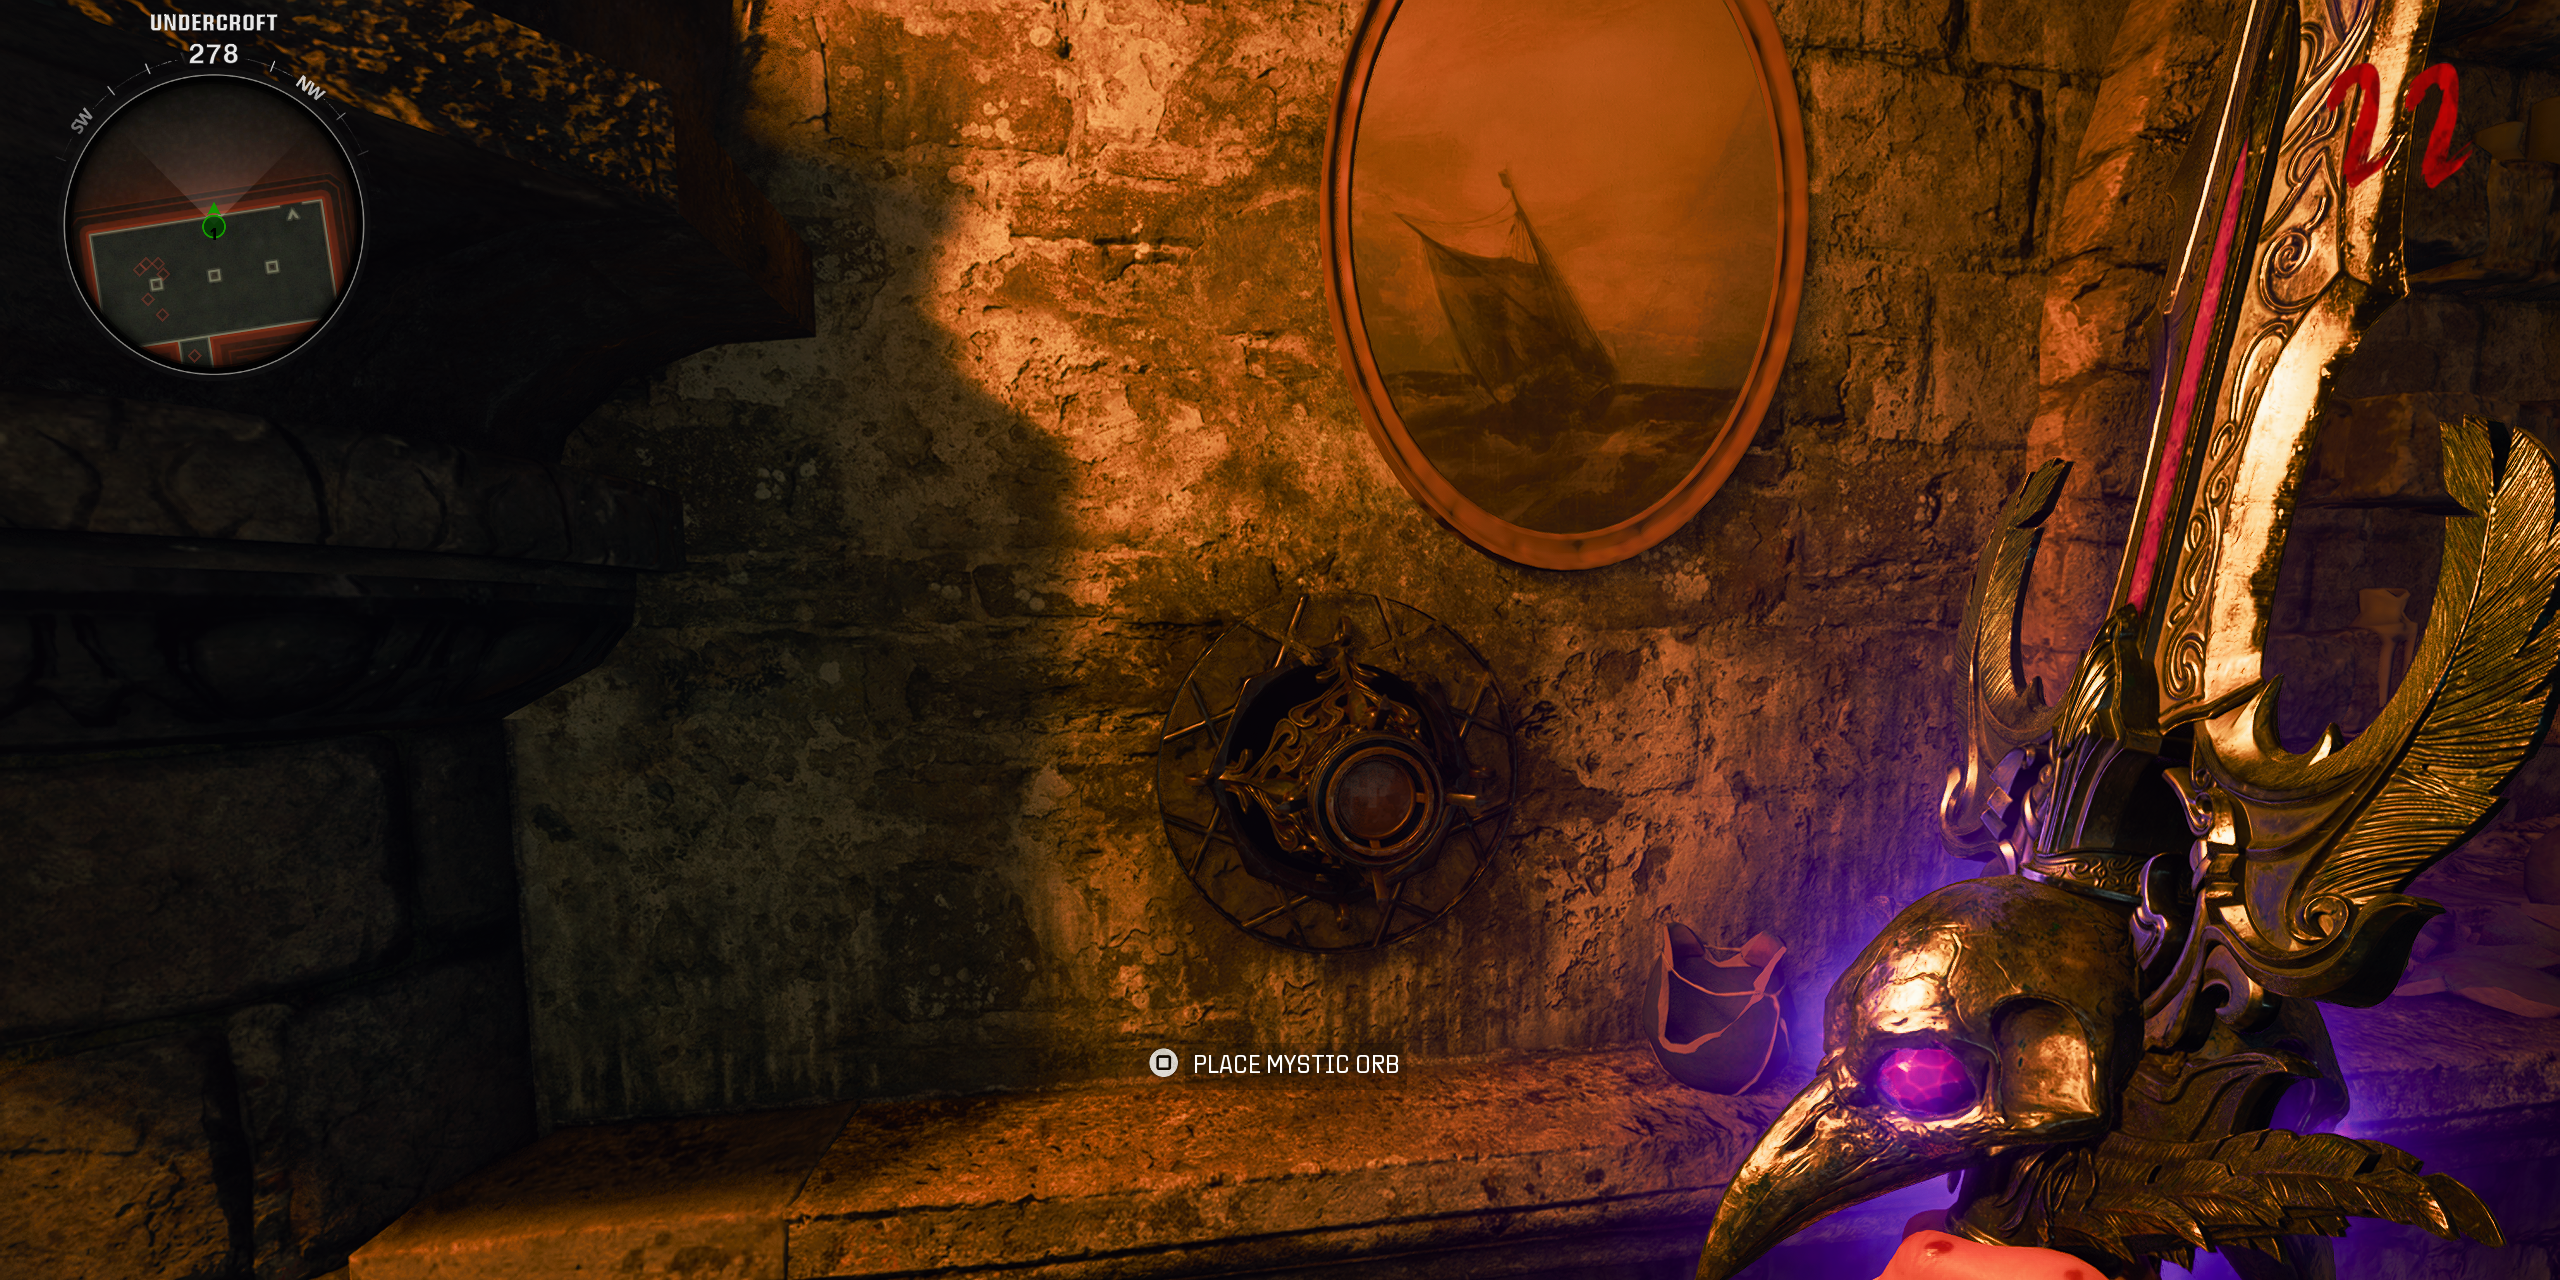
The second one Elemental Problem can also be discovered within the Undercroft’s West wall, the place avid gamers will want to carry alongside the Balmung Sword. This problem calls for avid gamers to get kills with void tears to feed the orb, so it’s easiest to make use of the Darkish Incantation throughout the Undercroft, and to make use of the Particular Assault of the Balmung Sword till the problem completes.
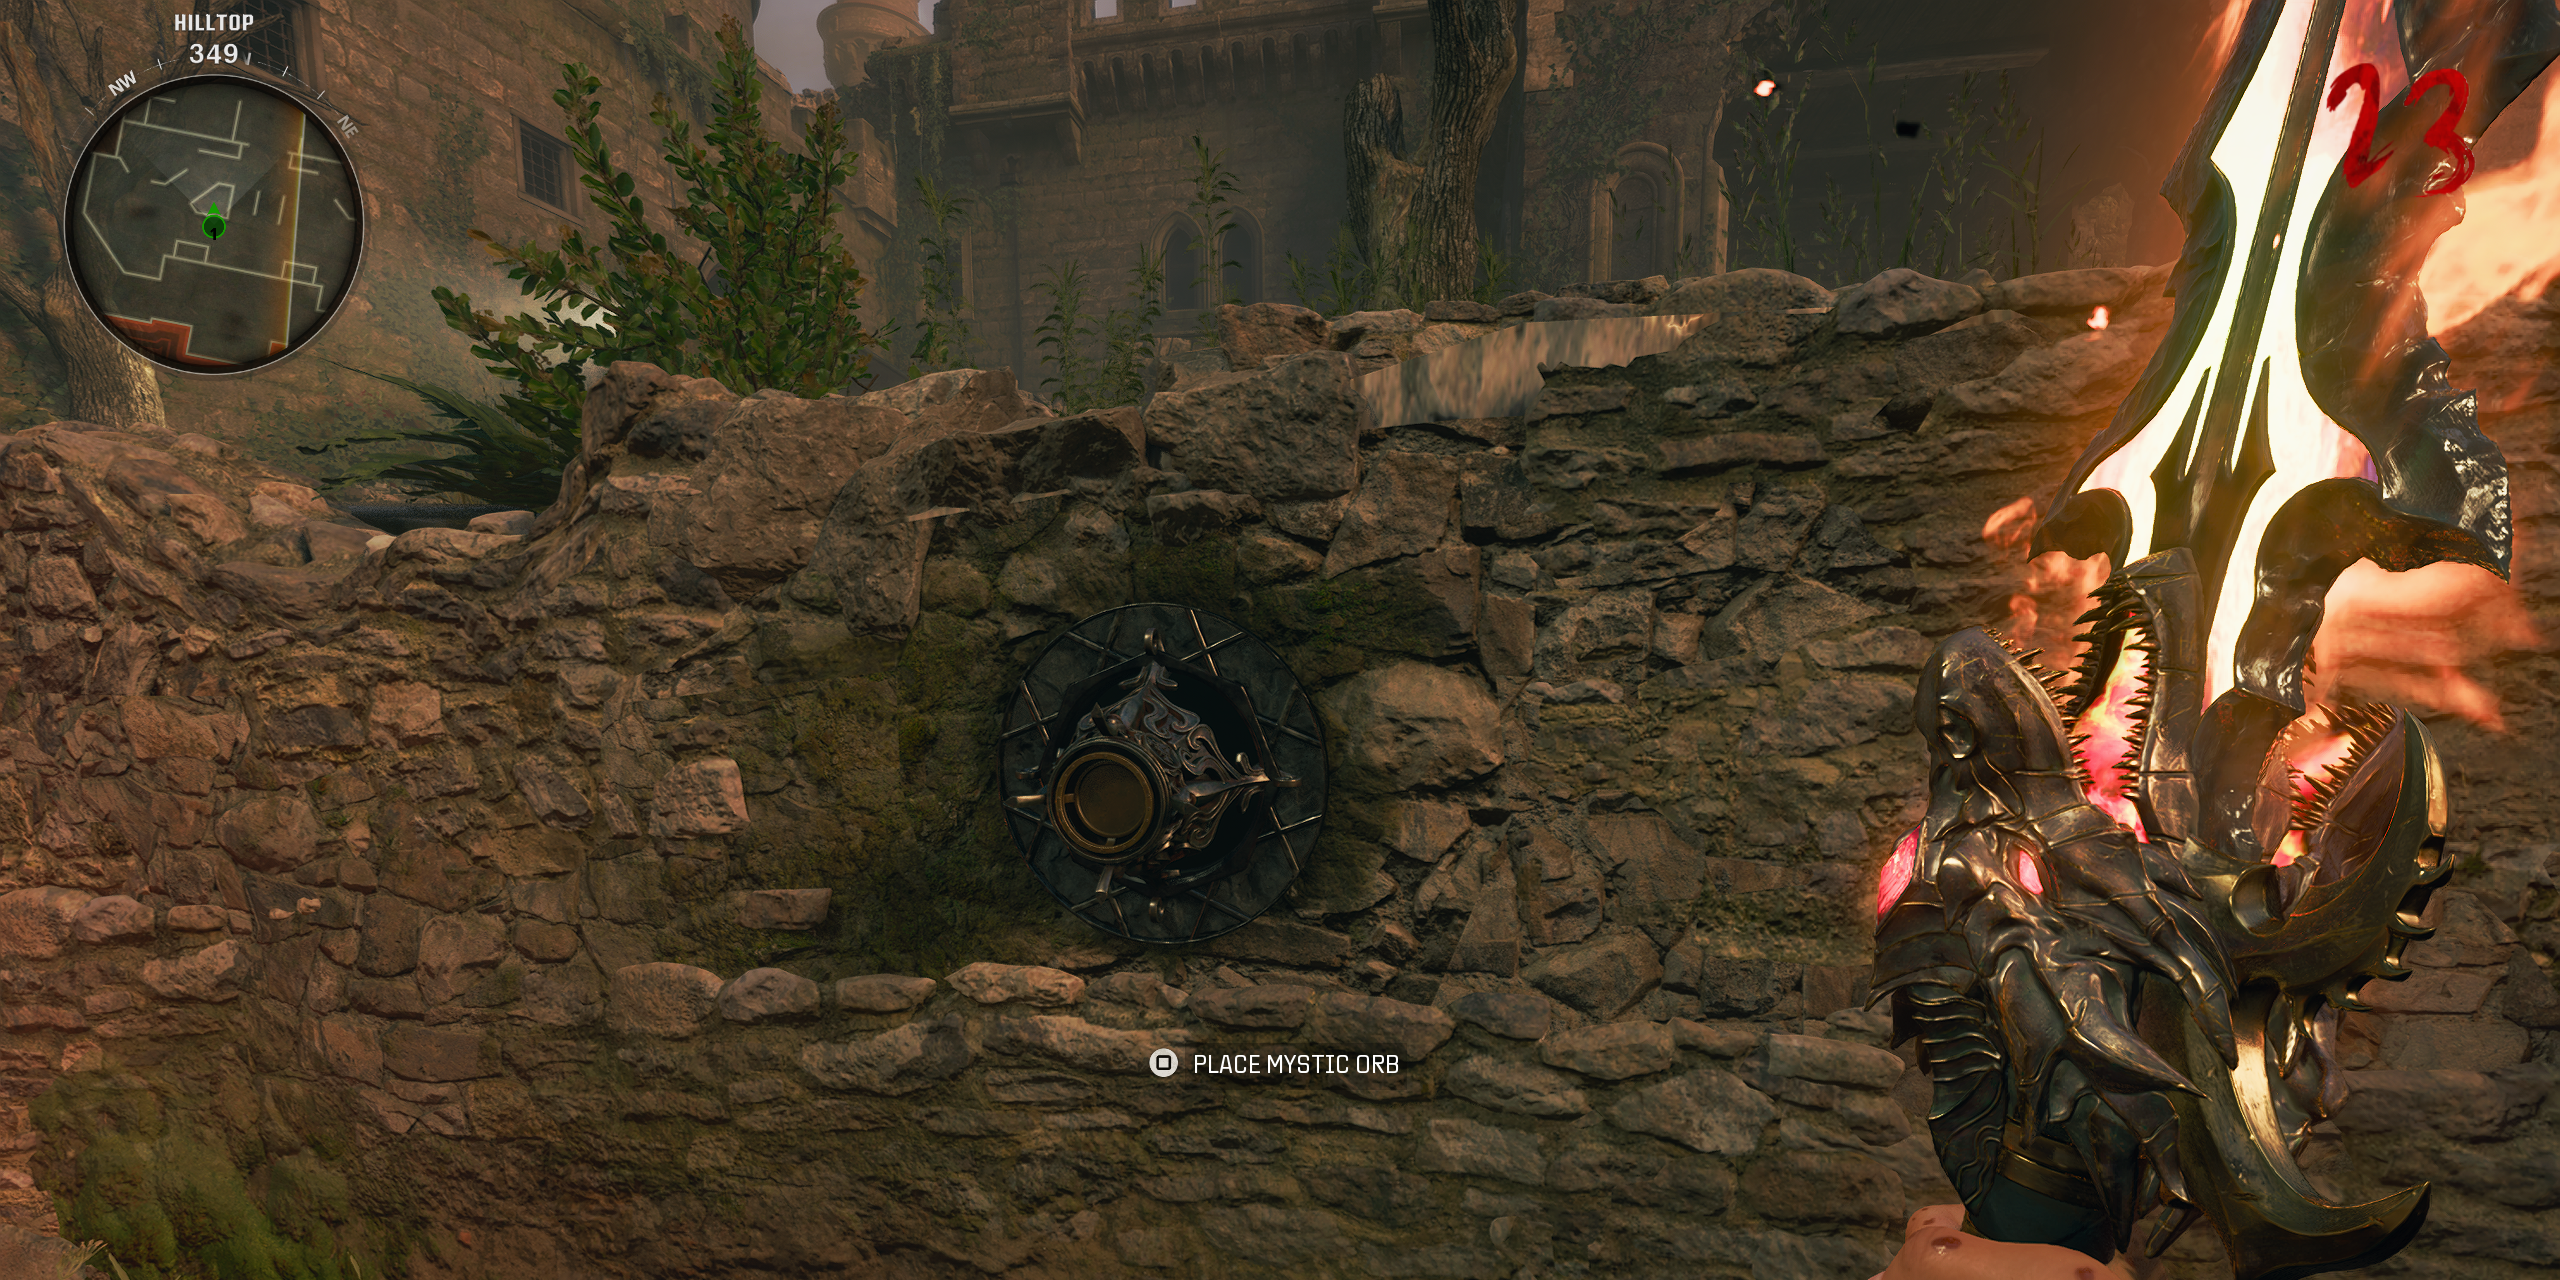
The 3rd Elemental Problem can also be discovered within the Hilltop space on the North wall reverse to The Arsenal. This problem calls for Caliburn, and the Fireplace Incantation, as avid gamers will want to get hearth and immolation kills to complete this problem.
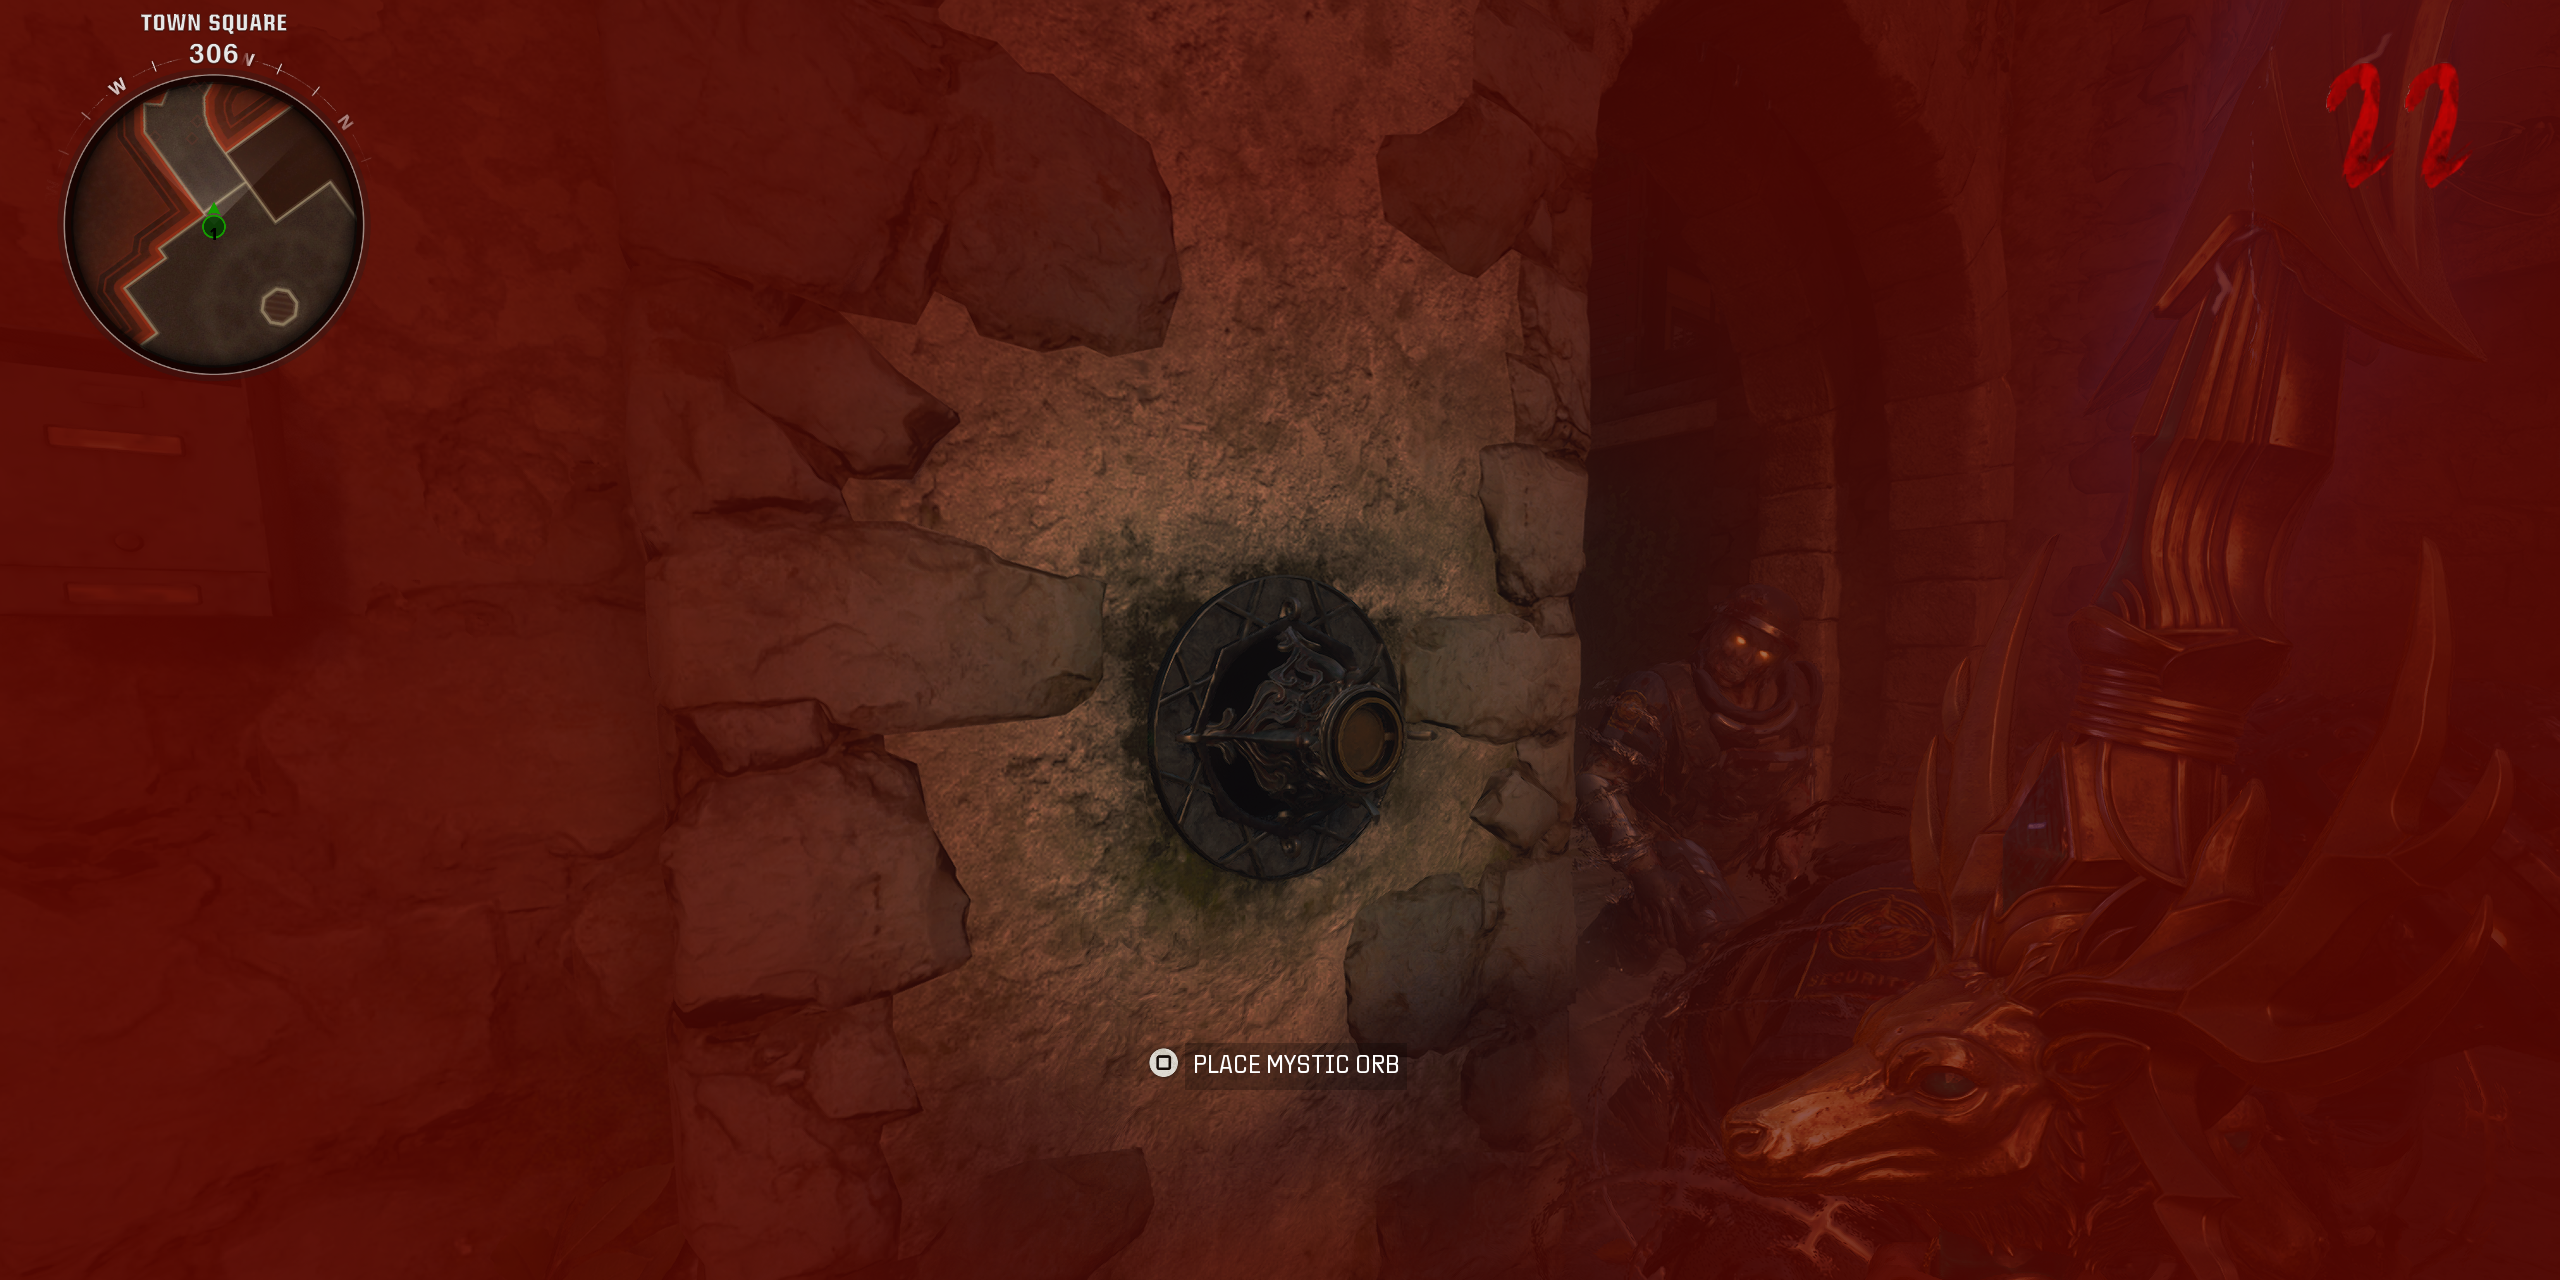
The fourth Elemental Problem is located on the The city Sq.’s West wall, the nearest wall to the Nature Trail. This problem calls for Durendal, and avid gamers can use Durendal’s Particular Assault and the Electrical Incantation to get electrical energy kills to finish this fourth and ultimate problem.
Step 12: Get ready for the Citadelle des Morts Boss Struggle
As soon as avid gamers have completed all 4 Elemental Demanding situations, take the Mystical Orb to the Undercroft Stairway’s West wall and slot the Orb within the empty socket the place avid gamers noticed the 4 symbols. Doing so will unencumber a Secrety Lecture room, the place avid gamers can have interaction with the cylinder to Turn on Historical Mystic Recording and take the Father or mother Key.
Avid gamers at the moment are in a position for the boss battle, nevertheless it’s crucial that avid gamers come ready. The most productive guns to battle the Citadelle des Morts boss is one thing that hits arduous and speedy just like the explosive Pack-a-Punched GS45 dual-wields. One thing with a large amount of DPS may be a good suggestion, just like the XM4. Each guns must be Pack-a-Punched to no less than Tier 2, avid gamers must carry a number of Essence to buy extra ammo within the enviornment, and they’re going to need to have all Perk-a-Colas and Tier 3 armor sooner than they input the sector.
To start out the boss battle in Citadelle des Morts, avid gamers can have interaction with the entrance of the statue discovered on the The city Sq. to Insert the Father or mother Key and get started the Ultimate Come across.
Step 13: Citadelle des Morts Boss Struggle – The Father or mother
The Father or mother is not any shaggy dog story, and he’s a md battle with excessive aggression and an absurd quantity of well being to make him a rocky bullet sponge. This nice boss will rampage across the enviornment, stomping on the flooring and looking to hit avid gamers together with his huge hammer. The Father or mother may even now and again throw out fireballs that want to be have shyed away from. The Father or mother’s assaults are lovely deadly, however with Perks and Armor, they received’t one-shot avid gamers. The ones wanting Armor can to find it from the zombies that periodically spawn all over the battle.
To wreck The Father or mother, avid gamers will want to shoot at his wrist gauntlets, boots, and again to wreck his armor and disclose his vulnerable issues. One of the best puts to shoot The Father or mother are the damaged armor items that glow, as that can deal essential harm. Explosives and DPS are crucial to wreck The Father or mother, and it’s vital to make use of PhD Flopper with Tribologist to slip round speedy and steer clear of his assaults.
Zombies and Doppelgangers will spawn at periods, however The Father or mother can kill those enemies himself, so avid gamers must steer clear of focusing hearth at the boss till the zombies are useless so that they steer clear of being crushed. The Father or mother has immune levels after avid gamers deal a definite threshold of wear, and all over those levels, avid gamers merely want to kill all of the zombies to development. After each and every section, the sector gets somewhat smaller and encompass itself in lava.
As soon as The Father or mother has been defeated, cross over to his corpse and select up the Amulet left in the back of. Doing so will cause the Citadelle des Morts ultimate cutscene, and after, avid gamers are given the selection to go out the sport or proceed taking part in to look what Spherical they may be able to succeed in.
After the Father or mother has been defeated, avid gamers could have finished the Citadelle des Morts Easter Egg Primary Quest!
Citadelle des Morts Easter Egg Rewards
As soon as avid gamers go back to the foyer after finishing the Citadelle des Morts boss battle, they’re going to obtain a couple of candies for his or her triumph:
Jacknife Operator Pores and skin for Weaver Citadelle des Morts Quest Whole Calling Card Doppelghast Accent
 Launched October 25, 2024